How to Get a Civil 3D TIN Surface from USGS Elevation Data
Pull USGS 3DEP elevation into a Civil 3D TIN in under a minute — existing-conditions context for feasibility and early grading, without tile hunting or CRS cleanup.
The problem
If you've done existing-conditions work for a site that doesn't have a topo survey yet, you know the drill for pulling USGS elevation data into Civil 3D:
- Find the tiles you need on the National Map (3DEP 1/3 arc-second or 1-meter, depending on what's available for your county).
- Download each tile — usually IMG or GeoTIFF, occasionally still LAS if you're going straight from point clouds.
- Mosaic them if your site straddles a tile boundary.
- Clip to your project extent in QGIS or ArcGIS Pro.
- Generate contours or a raster-to-TIN conversion.
- Export to a format Civil 3D will actually import cleanly — which usually means LandXML, because DEM-to-surface imports in Civil 3D are unreliable.
- Import, discover your CRS didn't carry through, reassign it, and pray the Z-units match your drawing's X/Y units.
None of this is hard individually. It's just fifteen minutes of tool-switching for something that should be a five-second query. And you do it every time you scope a new site.
The shortcut
Draw a bounding box in basemappr around your project extent, select the elevation layer, choose LandXML with contours as the export format, and download. Import the LandXML into Civil 3D as a surface. Done — you have a TIN.
No tile hunting, no mosaicking, no separate CRS reassignment step. The export is scoped to your bbox and already in the right coordinate system and units for the drawing you're building.
What this surface is and isn't
3DEP is a remote-sensed elevation model, not a survey. The 1-meter lidar-derived data, where your county has it, is specified at roughly 10 cm RMSE vertically in open, non-vegetated ground — call it a third of a foot, and worse than that under canopy or on steep slopes. The 1/3 arc-second seamless DEM, which is what most of the country falls back to, is closer to a meter. Either way, you're looking at ground that was measured from an aircraft, resampled onto a grid, and then contoured.
That's genuinely useful for the work you do before anyone commits money: feasibility, scoping, early grading studies, checking whether a site drains the direction you assumed, deciding whether a parcel is worth pursuing at all. It is not useful for quantities, for permit submissions, or for anything that goes under a stamp. You still need a survey for that, and this surface doesn't shorten the survey.
Which is exactly why the workflow above is fast. It's doing a smaller job than a survey, on purpose.
Step-by-step
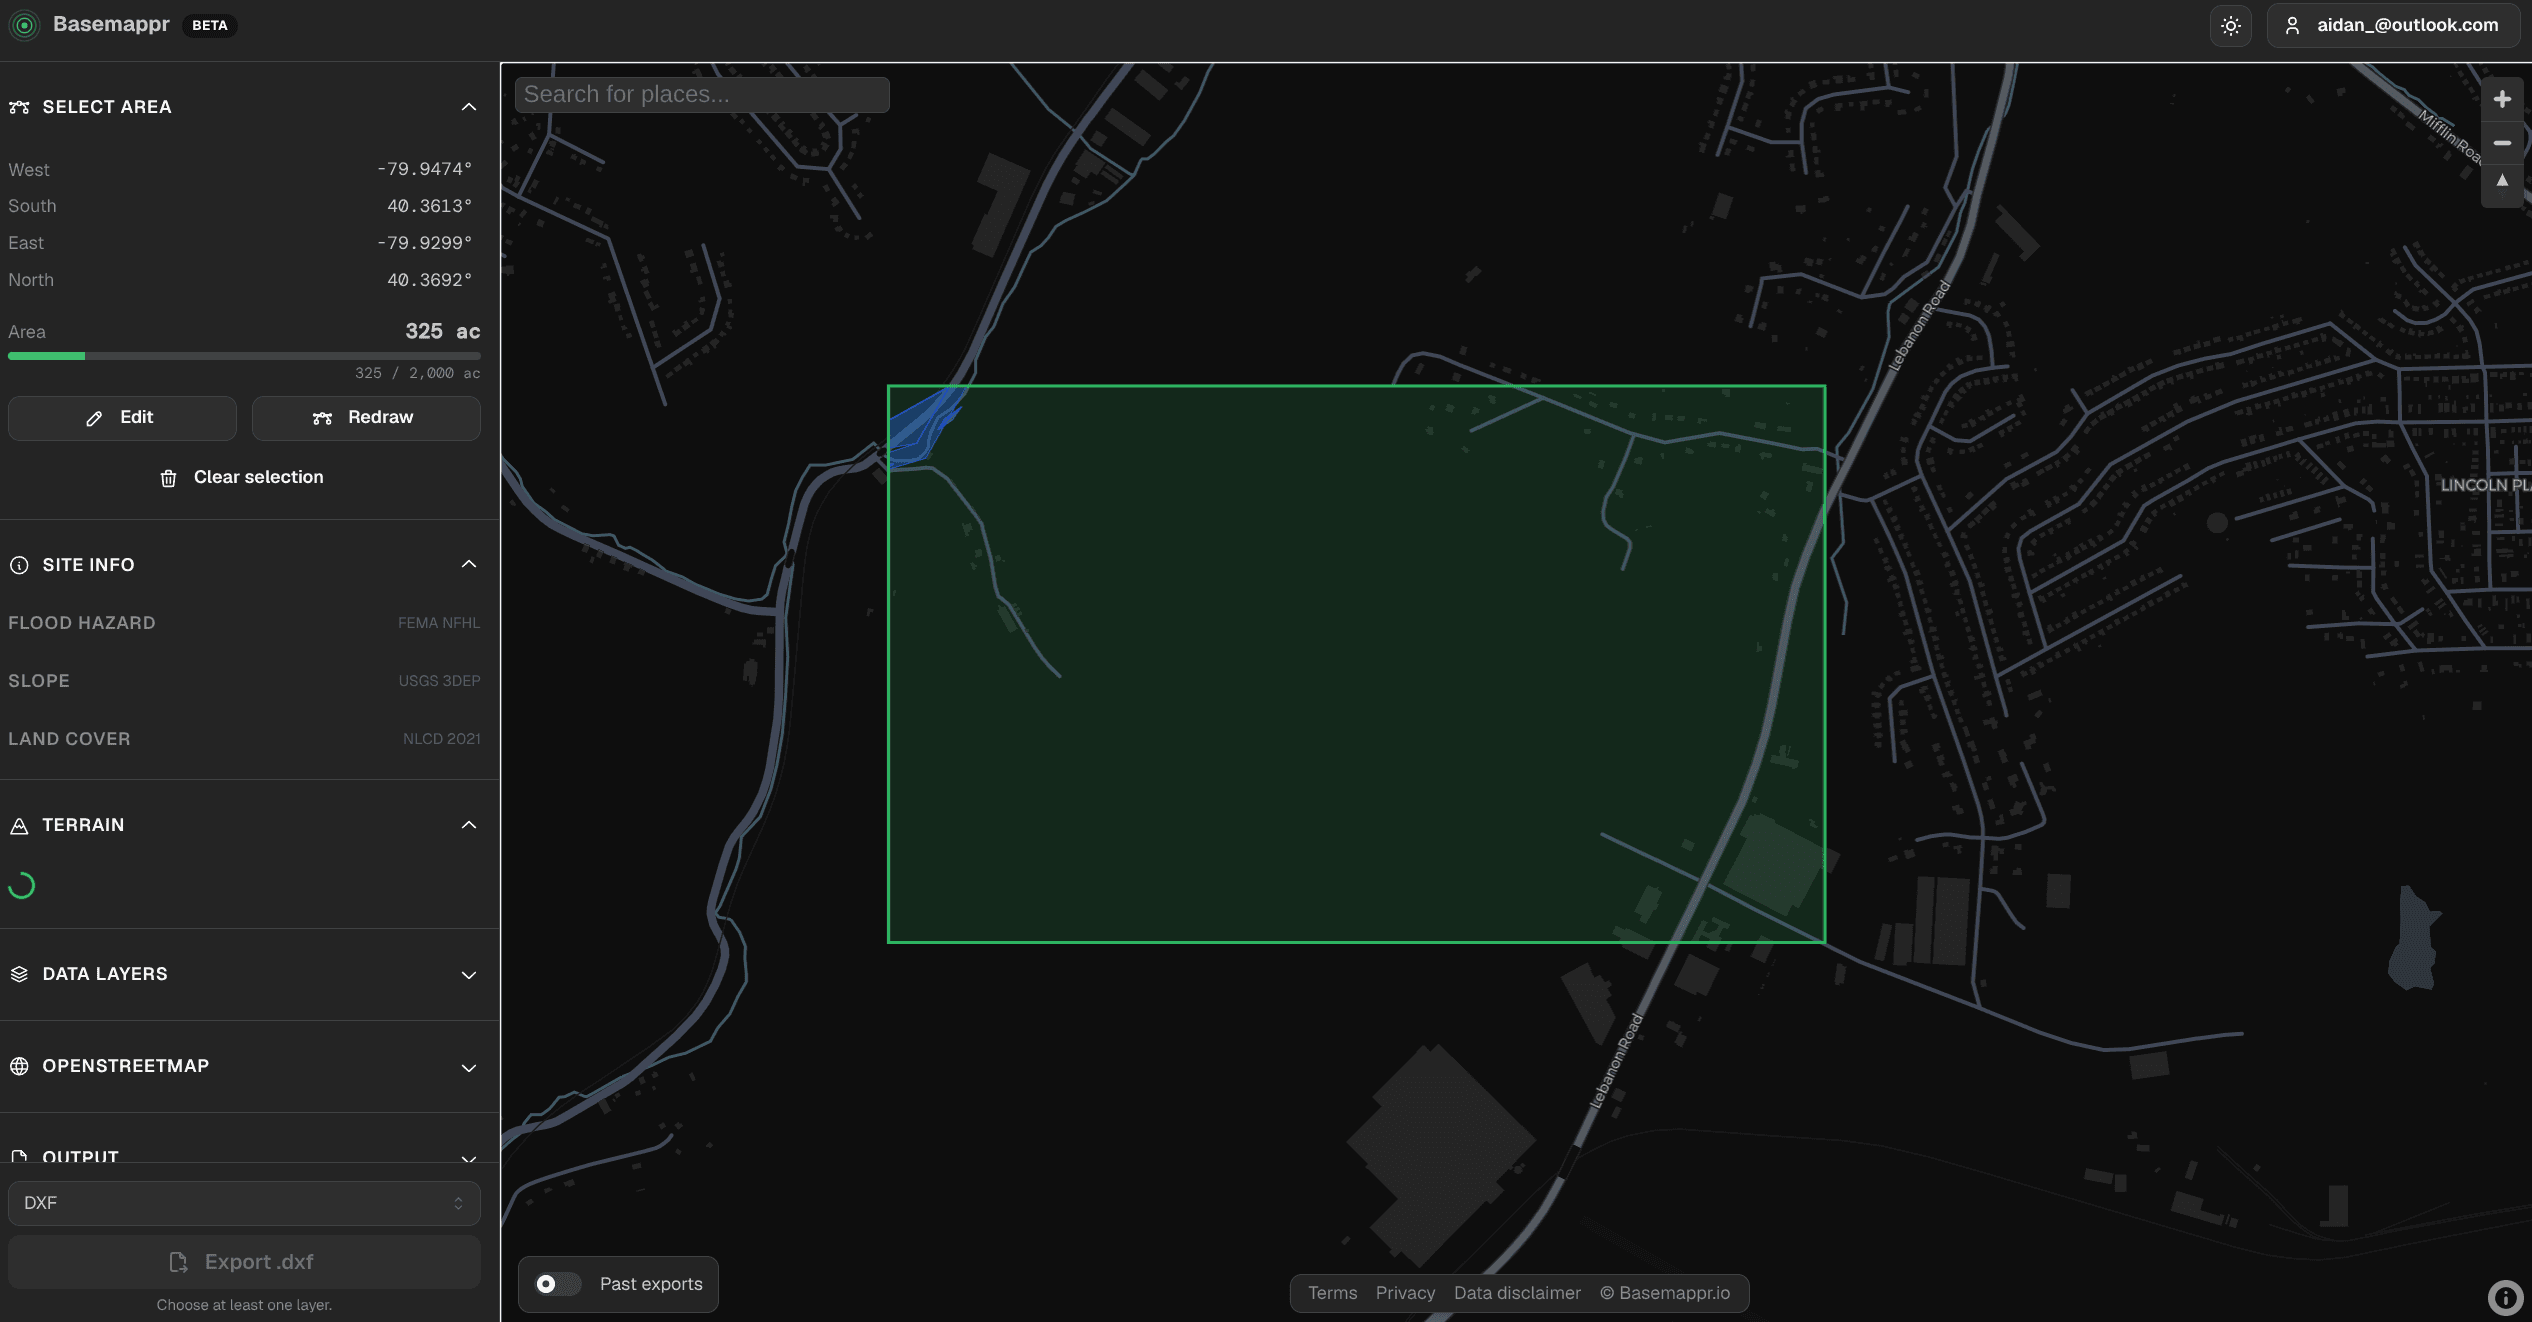
- Open basemappr and shift+drag a bounding box over your site. Pad it a bit past your actual property line — you want triangulation to extend past your edge conditions, not stop exactly at them.
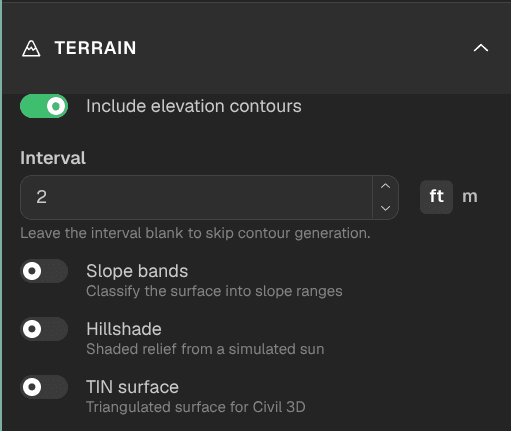
- In the export panel, select the elevation/contour layer. Set your contour interval — 2' is the practical floor for 3DEP-derived contours, and 5' is the honest choice on a larger or rougher site.
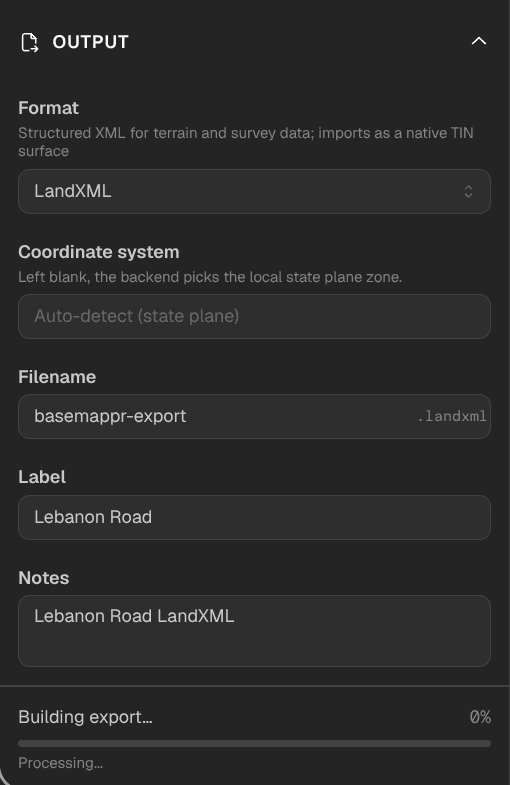
-
Name the file, submit, and wait for the job to finish. For a typical single-parcel bbox this takes well under a minute.
-
In Civil 3D: Insert → Import LandXML. Point it at the downloaded file. When prompted, add the surface definition — you'll see it under Surfaces in Prospector with contours already populated.
-
Check your CRS assignment (Toolspace → Settings tab → right-click the drawing → Edit Drawing Settings) to confirm it landed on the right State Plane zone, then build your TIN and start pulling spot elevations.
Try this workflow in Basemappr
Draw a bounding box over your next site and export a Civil 3D-ready TIN surface in under a minute — no tile hunting, no CRS cleanup.